This subject is not a complicated one, but it is one that takes some practice. Many of what we call “Deep Sky Objects”, which include things like nebulae, galaxies, and star clusters, are rather faint from our view here on Earth. While many of these objects are actually rather large, even larger than the apparent size of the Moon in the sky, they are so faint that they are difficult to find, especially for beginners. That means that sometimes you can have your binoculars or telescope right on the object you want to look at and because it is so faint you might either not see it at all or miss it the first time. So how do we find objects we can barely see? Star hopping. Star hopping is exactly what it sounds like. You locate known stars that are close to the object you want to see and you follow them until you find it. Like using the stars as an arrow pointing you in the right direction. So where do you start with this? In my opinion, you need a planisphere, a red light (to preserve your night vision) a star chart, and a pair of binoculars.
Planispheres
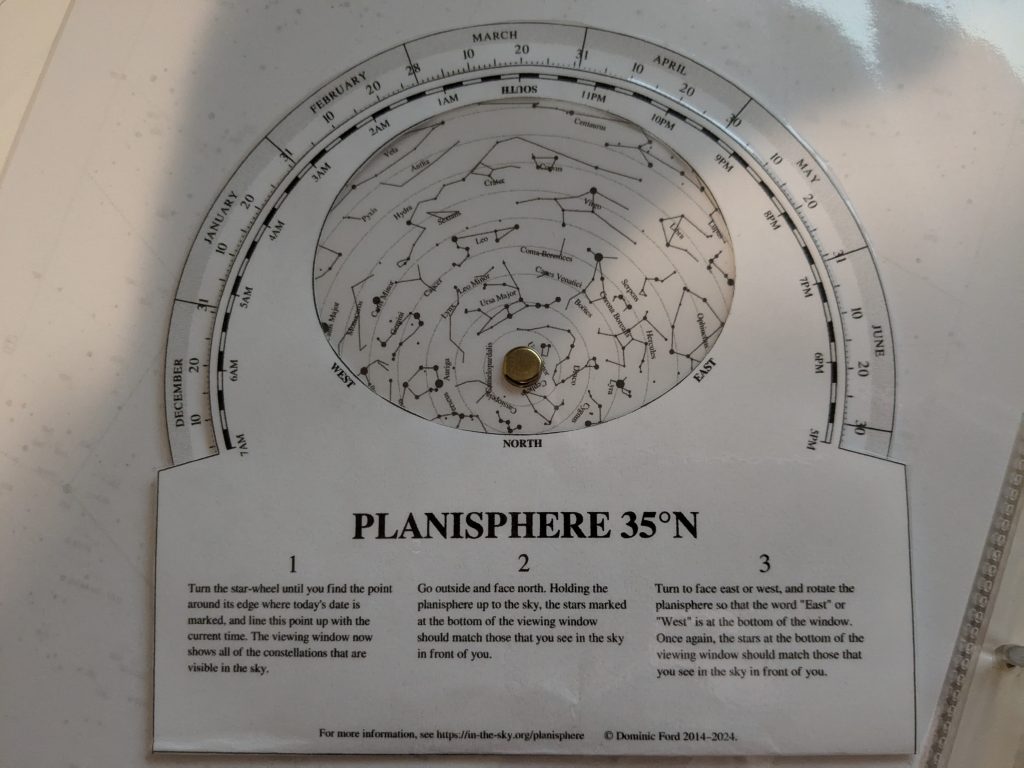
So what is a planisphere? That’s a weird word right? Well it is just a fancy word for a small star chart that shows you what constellations are up during a particular date and time. There is a free site, here, that generates one for where you live and then you can cut it out and make your own, like the one I made below. Remember to select the correct latitude for where you live so that the planisphere is accurate for your location. If you are traveling somewhere with a significantly different latitude, it might be worth making a new one for that location before you go.
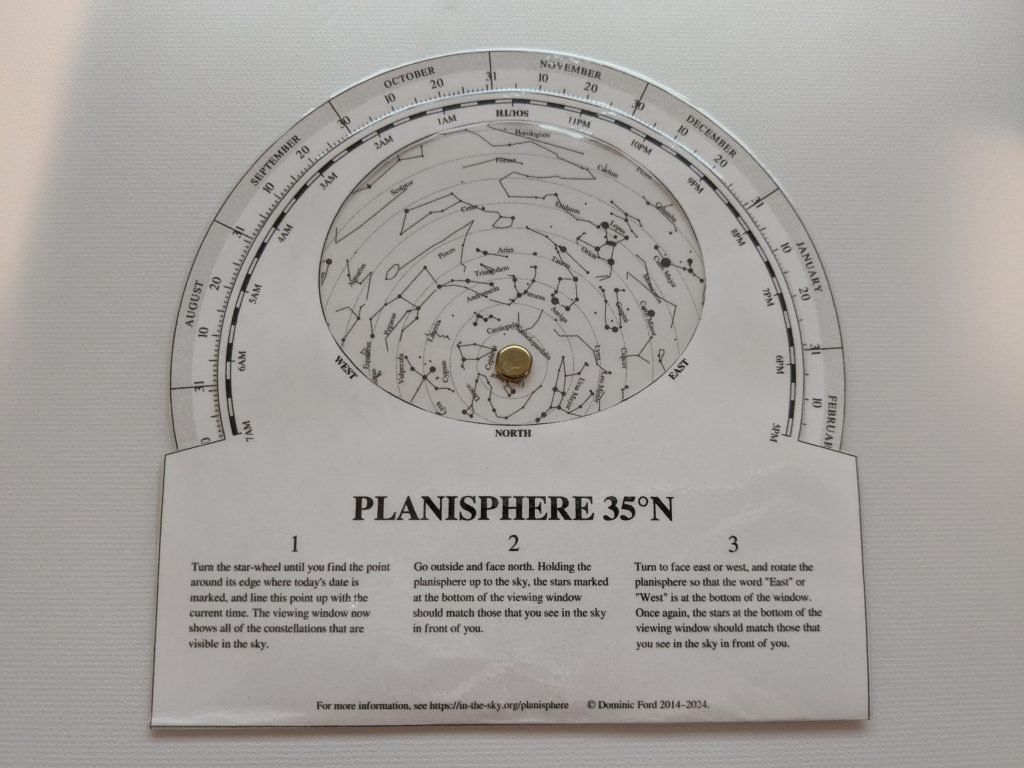
I use mine mostly for planning my observing sessions since I can use it to tell what constellations are going to be up when I am outside, but it is also very useful when you are actually out in the field to identify constellations that you may not be fully familiar with. If you know what constellation an object you want to observe is in, this helps you start in the generally right direction to find it.
To use a planisphere, have a look at the outer rings. Notice that there are two of them. One for date and one for time. If you turn one of the rings until the time you are viewing is lined up with the date you are viewing on, you will have a representation of what will be up on that night at that time. As the night wears on, you will need to turn the wheel to keep the view current with what you are seeing. The planisphere has the cardinal directions printed on it, with North at the bottom. Face North and the stars printed on the paper will match up with what you are seeing on the sky when you hold the planisphere up. Then you can start matching up the representations on the paper with the actual constellations you can see. I would recommend going out one night with nothing but your planisphere and your naked eye and getting familiar with the constellations that are out on that night. It is good practice and good fun too.
Star Charts
A star chart is the astronomer’s best friend in my opinion. You may have noticed, but I have yet to recommend any software or mobile apps for finding astronomical objects. Why is that? Well, it is because looking at a screen is one of the fastest ways to ruin your night vision. Remember how I said that many of the deep sky objects you may be searching for are very faint and difficult to find and observe? Well, this is one of the ways we mitigate that issue. By avoiding looking directly at a screen we can keep our pupils as dilated as possible. To this end, a paper star chart and a dim red light (as dim as possible while still being able to read the chart) are invaluable tools when looking for objects for which do you do not already have a good grasp of location for.
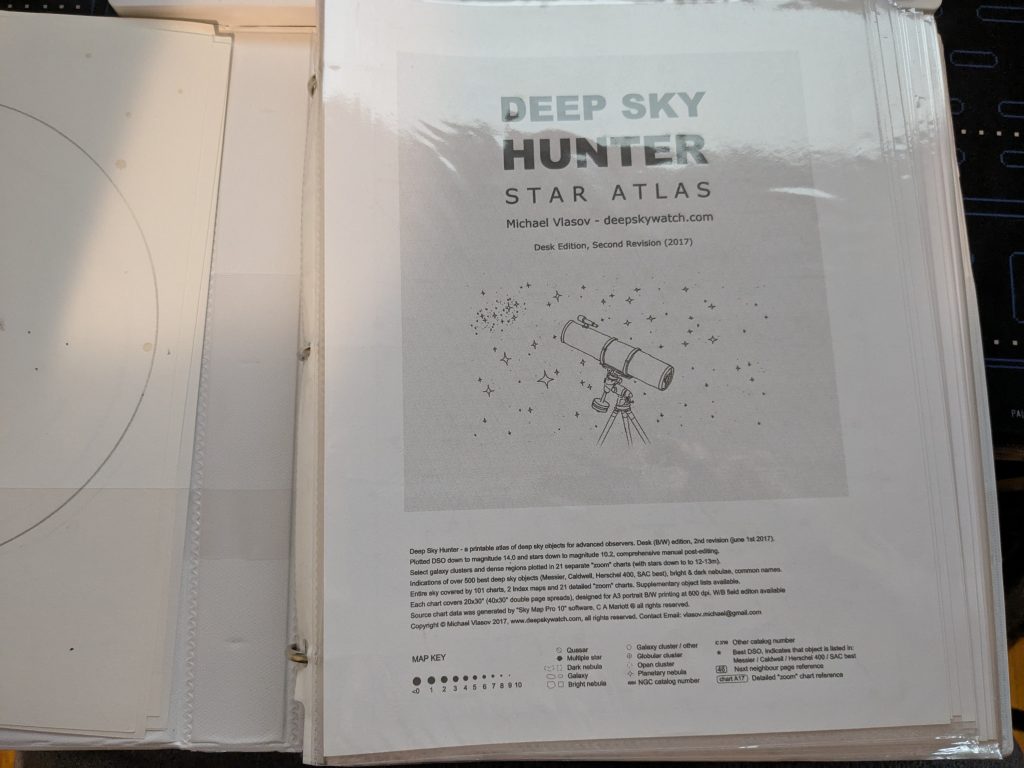
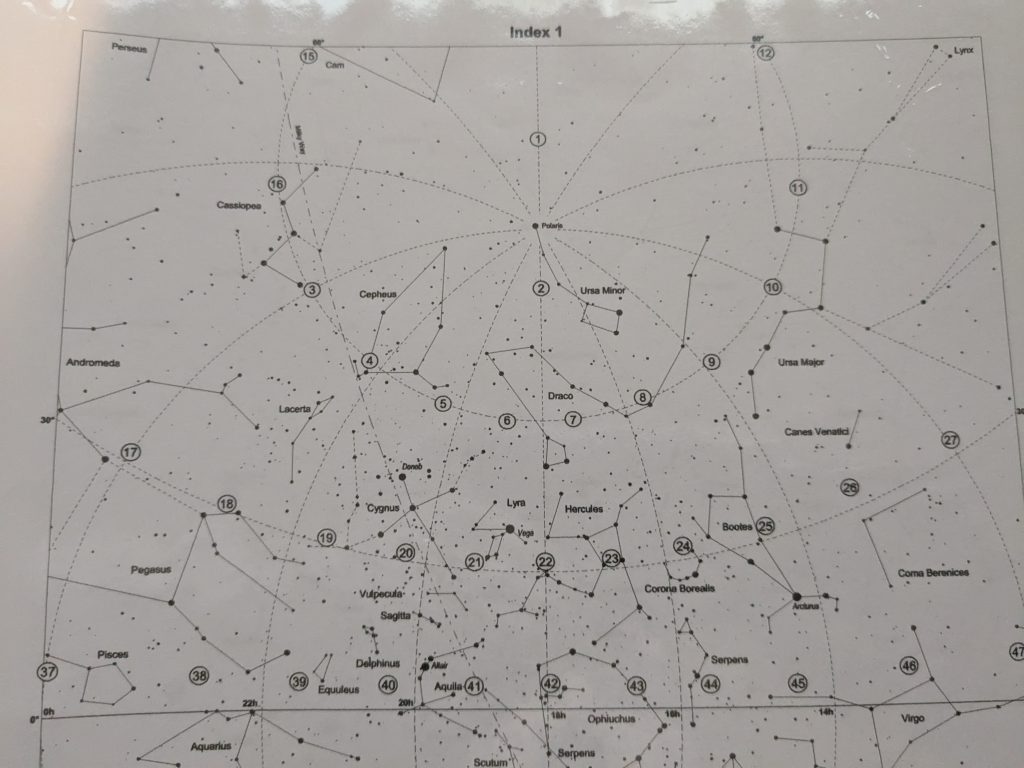
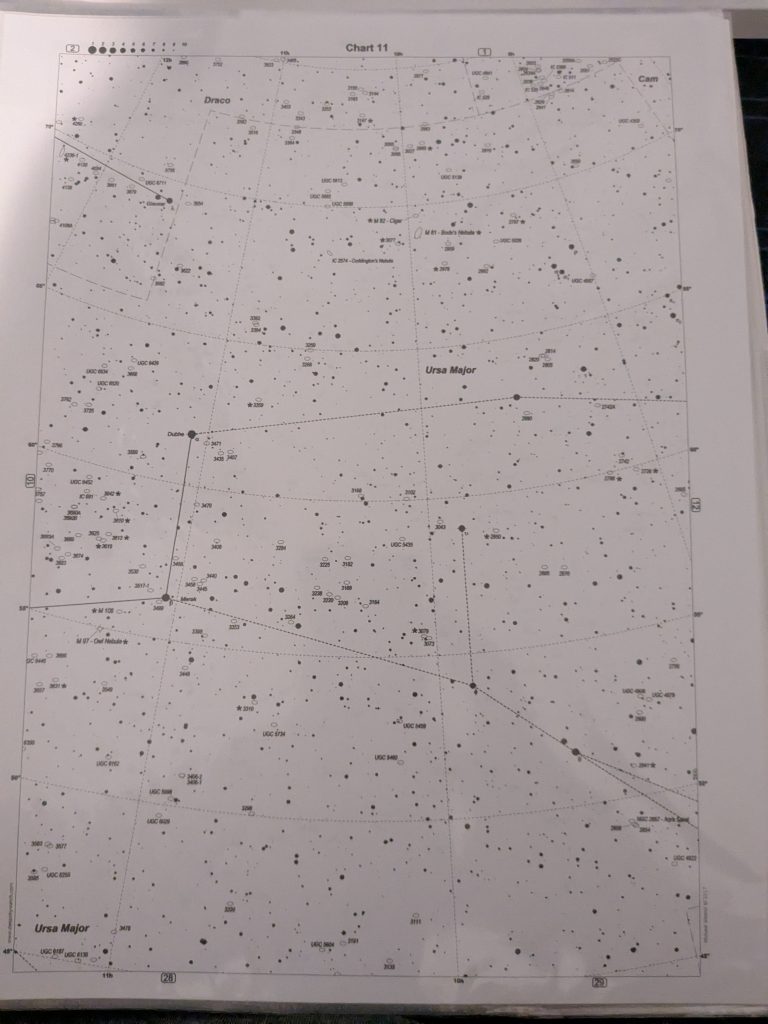
Now, I can hear your wallet retracting back into your pocket when you search for star charts, because new ones can be rather expensive. Fear not though, because just like with the planisphere, if you are willing to do a little bit of DIY work you can make one yourself. Simply go to this website and download the PDF of the star chart and then print it out. I put mine in a 3 ring binder with page protectors and now I have a perfectly usable star chart for which the only money I have in it is the ink, paper, page protectors, and the binder itself. I estimate that including the paper and ink I probably spend about $30 total plus my time and I have not felt the need to purchase any other charts because this one is so detailed. You can see some images below of the chart that I made.
Another great use of the chart is to plan your observing session before you go out. You can use your planisphere to see what constellations are up when you will be observing and then use the star charts to inspect those constellations for interesting objects that you would like to find. On cloudy nights I will often sit with my planisphere, star chart, and my tablet to plan future observing sessions (I use this to plan imaging sessions as well!) I use the tablet mostly to look up what an object should look like. You can find many examples of sketches people have made at the eyepiece to give you an idea of what you should see. I will be writing another article soon about how to sketch astronomical objects at the eyepiece.
Star Hopping
So now comes the star hopping I was talking about earlier. Once you have used your planisphere to find the constellation containing the object you are looking for, you can turn to the page in your star chart with that object on it and look for patterns of bright stars in the area. You will use these patterns of bright stars to help you locate the dim deep sky object you are looking for.
My method for this usually involves my binoculars even if I already have my telescope out. This is because it is easy to point your binoculars and because binoculars have a right-side-up view, whereas depending on what telescope you are using the image could be upside down or left-to-right. This doesn’t matter so much in space, but the right-side-up view corresponds better with the star chart, making orienting yourself that much easier. So, find the pattern of stars that jumped out at you on the page, and also note their relative distances to each other. You will also be using that to help you find the object in question. For example, if you see that there are 3 stars in a row and that they are all roughly the same distance to each other and your object is where one more star in the chain would be at about the same distance, you can visualize where that should be a little better if you keep in mind the distances to the stars. The same applied if the object is say double the distance of two stars. I think you get the point by now, but I will have some example images that I have created to illustrate the point below.
When you move to your telescope, keep in mind that the orientation will be different, even between your finder scope and your main telescope. For example, I use a Dobsonian telescope, which is a Newtonian reflector, but my finder scope is a small refractor. That means that my main telescope and my finder scope flip the image in different ways. You will have to do a bit of mental gymnastics to find the patterns you are looking for. By the way, be sure that your finder scope is well oriented to your main telescope. I will have another article in the future explaining how to set up your equipment, but this is critical because once you have where you think the object should be in your finder scope, using your lowest power eyepiece (the one with the longest focal length) look into your main telescope and see if you can see your object. It is best to practice this on bright objects like the Orion Nebula, the Andromeda Galaxy, and planets before looking for anything truly faint. Bright objects should be use for practice since they will likely show up in your finder scope as well so you can confirm that you are on them.
As and example, I would like to show you how to find the galaxies M81 and M82, or the Bode’s and Cigar galaxies. These galaxies are just off of Ursa Major and since I am writing this in April, it is a good time to view it. You can see that on my planisphere below.
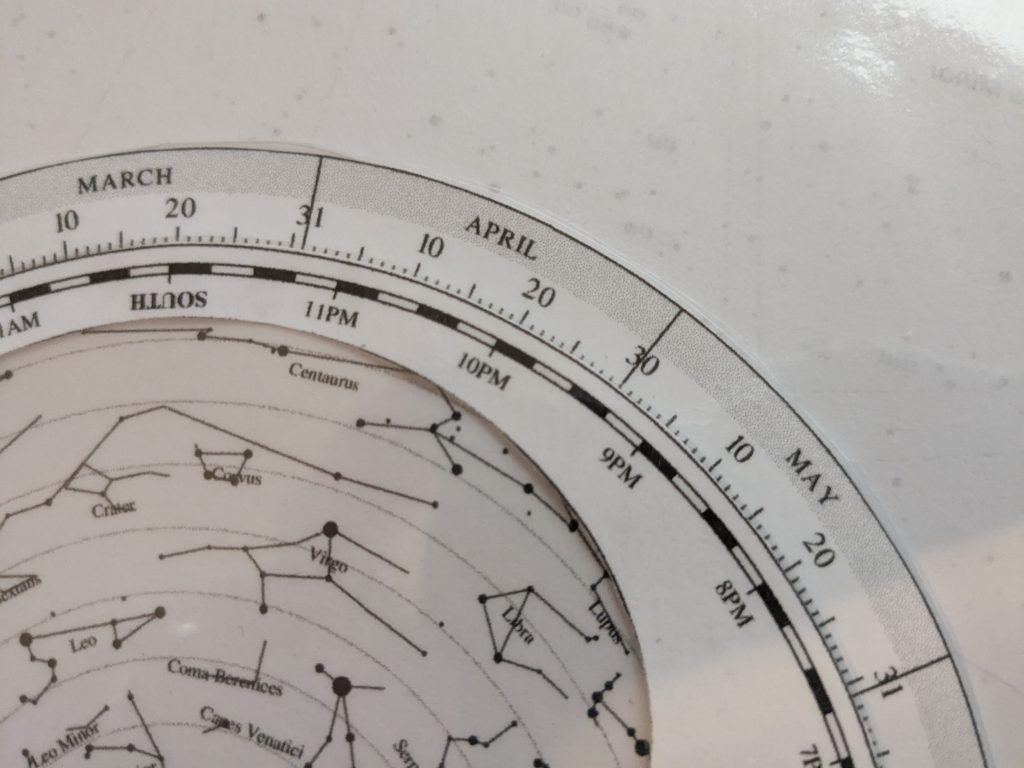

Here you can see that at 10 pm on April 19th Ursa Major is basically directly overhead. For several reasons, it is best to look at something when it is almost (though not always directory) overhead.
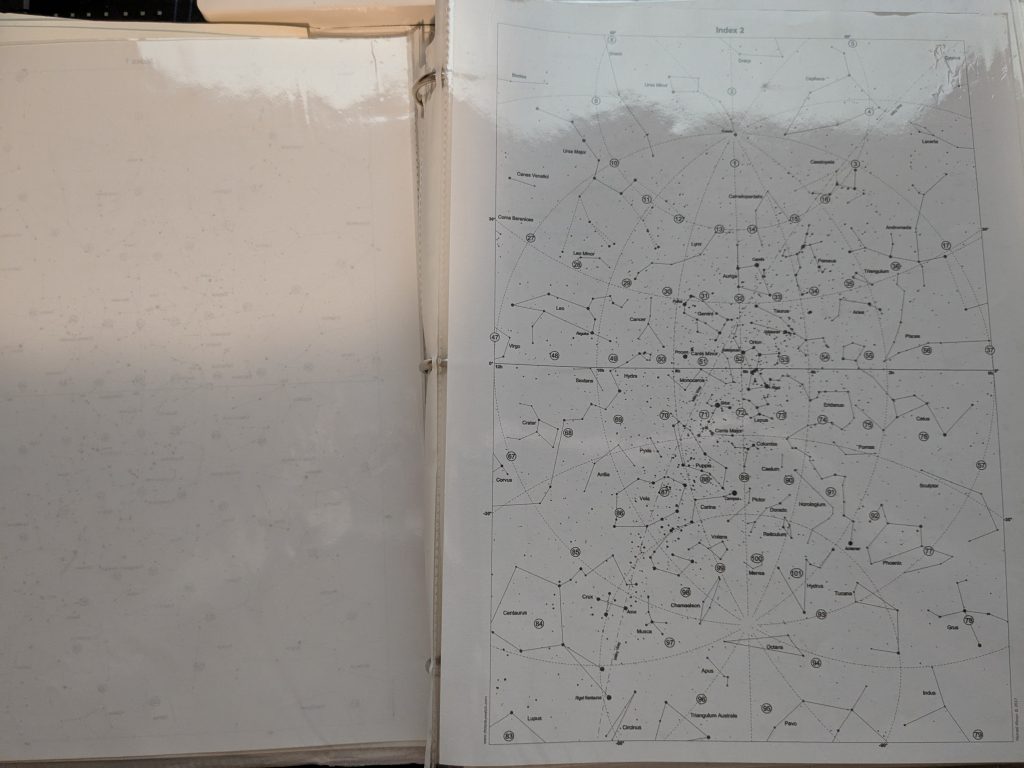
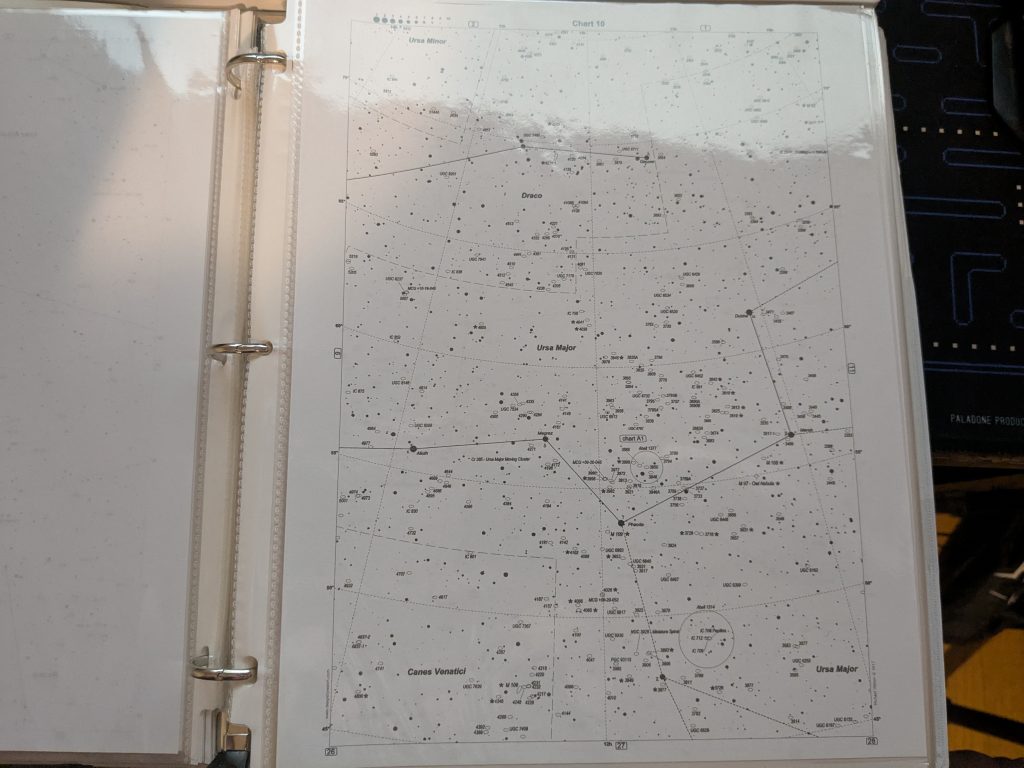
Now we look at our star chart to find the constellation there. In the front of the atlas is an index where you can find the entire sky represented on the page. Find your constellation and go to the corresponding page(s). In this case, Ursa Major is on pages 9, 10, 11, and 12. By the way, most of the well known constellations are HUGE on the night sky. That means that since the sky is broken up into equal sized chunks in the star chart, they end up getting spread across several pages. To save your attention span, I will go ahead and say that I looked at all 4 pages, and found that the best one to get where we want to be is page 11 of my cart.
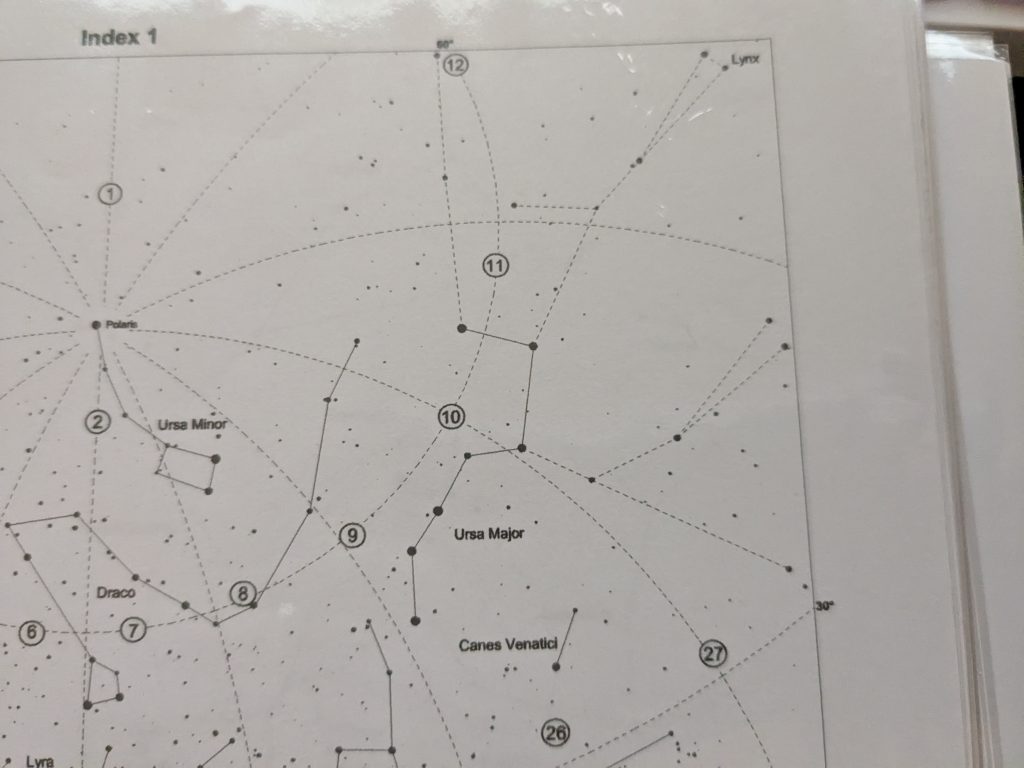
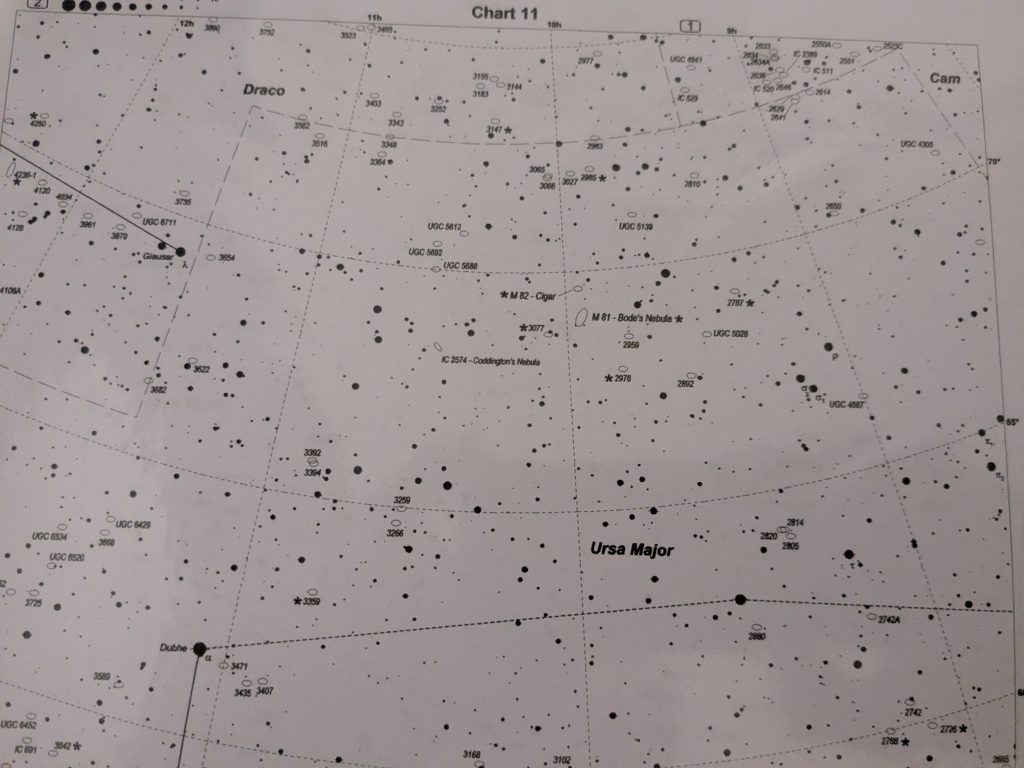
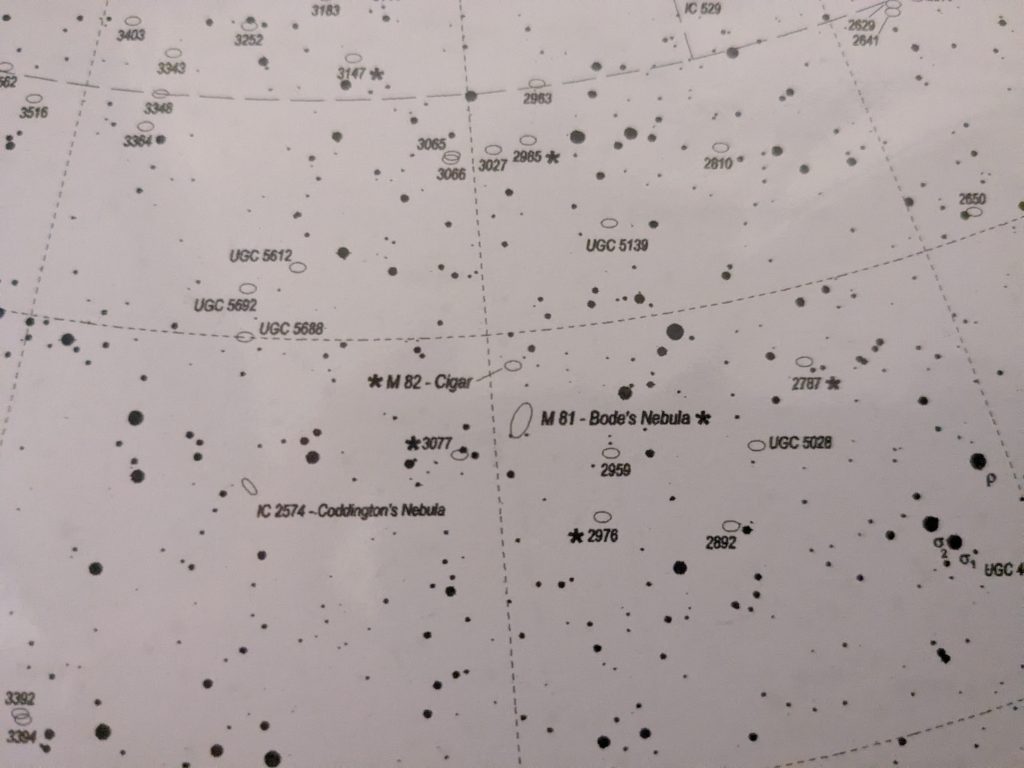
Now what you would do is search for bright patterns of stars to help you find what you are looking for. In this example, you would start with the brightest stars closest to it in Ursa Major. For me, that starts with Dubhe. Then, you find a few more bright stars in recognizable patterns for you to find in your telescope and follow those until you find your object. The goal is to pick stars that are bright enough to find in your finder scope so that you can get your main scope on target before you even look in the eyepiece. Below is an example of the path I follow and the stars I look at when I am trying to find these objects.
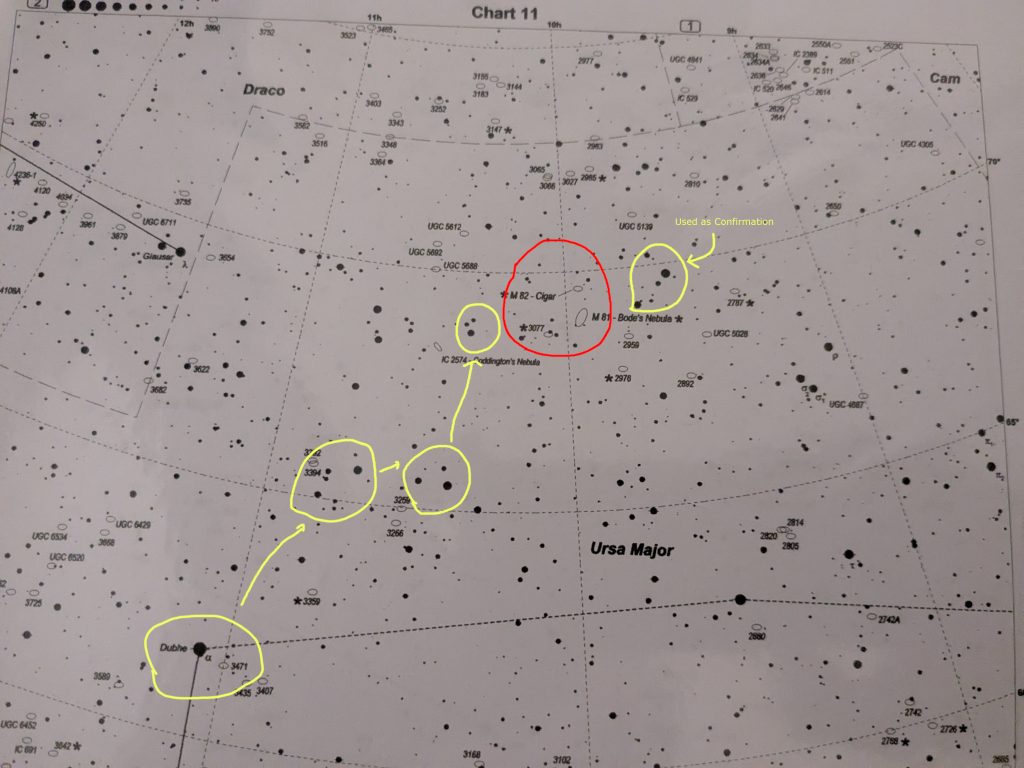
And that is it! This is the best way to find objects in my opinion and it really just boils down to finding recognizable patterns of stars and finding your object of interest relative to that pattern. It is more difficult than it sounds when you put it into practice, but it takes just that. The more you practice it, the easier it gets. In the near future I may make a YouTube video explaining this on camera, if I do I will return to this post and amend it to include a link to that video. Thanks for reading!